Getting started: Configuring a project for the first use
Isolator++ Professional installs the following folders. They include the following contents:
Installed Folders
| Folder | Contains |
| Bin | IsolatorCore.dll IsolatorCore.lib files. You'll need these to link to your test project and to run it. |
| Include\ForTests | Isolator.h header file. You'll need to include it to compile your tests. |
| Examples | Solutions containing examples of using Isolator++ |
| GTest | Google Test testing framework. You'll need this to run the examples, although your tests can use any framework. |
Creating the test application
In this example, we will create Isolator++ tests running inside an executable console application. This setup works with test frameworks like Google Test, Boost Test, UnitTest++ and others.
For MSTest Projects see Setting up MS Test
To start, create a new C++ Console Application:

Configuring the test application
Including the .h file
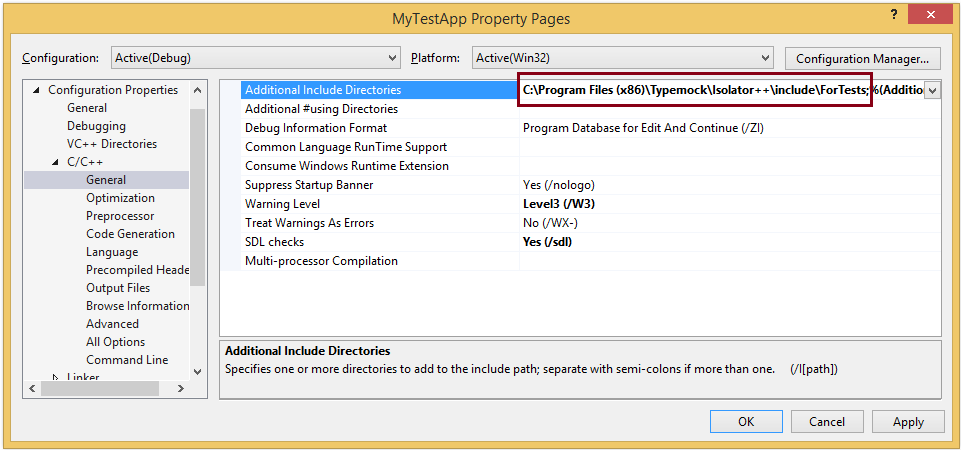
Open the project properties. Add the Isolator++ Include\ForTests folder to the include directories.
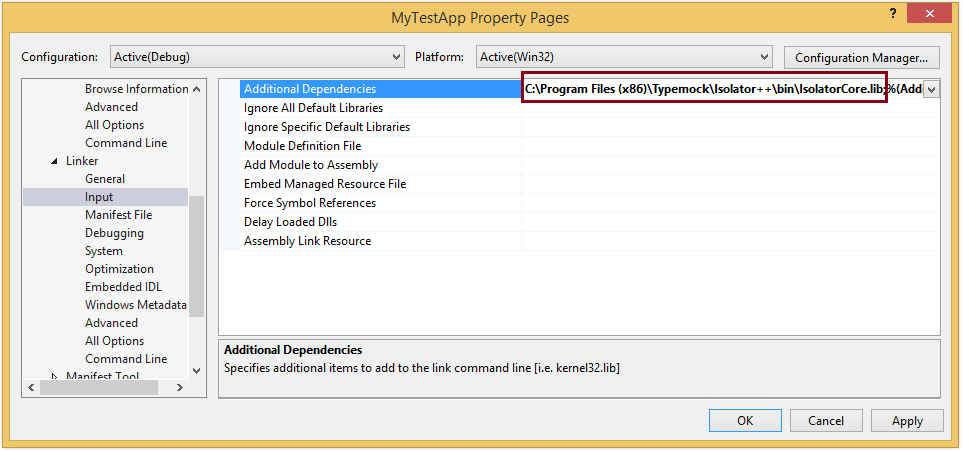
Add the IsolatorCore.lib to the linker input list. Note, we're using the x86 library, if we want the x64 bit we'll link to the library from the x64 folder.
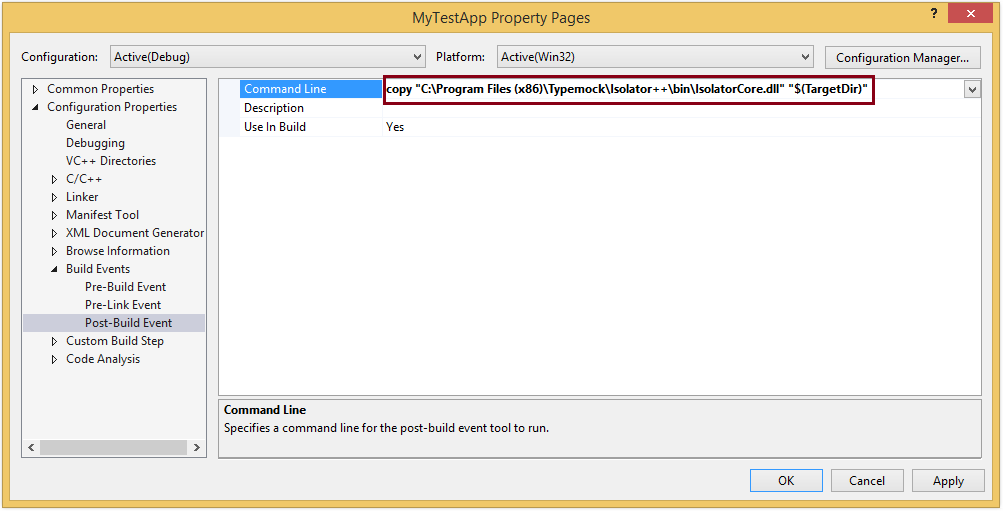
As the last step, make sure to copy IsolatorCore.dll to the location of the tests executable path. We'll do it by using a post-build event (note that for the 64-bit version copy the dll from the x64 folder). Do not forget to add "$(TargetDir)".
*Note that If you are running your tests with MSTest runner, please make sure to copy the mstest dll as shown below:
| copy "C:\Program Files (x86)\Typemock\Isolator++\bin\x64\msdia140.dll" "$(TargetDir)" |
That's it!
You've just run your first tests. It's time to learn more about Isolator++ Professional features. More info is available in our Documentation at https://www.typemock.com/docs/?book=Ipp&page=introduction.htm